Thursday, January 6, 2011
custom shape tween
First of all I made a layer named "TEXT" and wrote "Multimedia Design" in Vladimir script. Then I made the background black and the text yellow. Now I made a new layer named "SHAPE" then on that layer I made a yellow rectangle that then turned in a light blue poly star. Then i had the polystar change to an oval. Also at the same time i made a pacman eating a cherry

FLASH: Tutorial 1
first of all i made a layer named "TEXT" and wrote "Multimedia Design" in vladmir script. Then i made the backround black and the text yellow. Now i made a new layer named "SHAPE" then on that layer i made a yellow rectangle that then turned in a light blue poly star.
Thursday, December 23, 2010
Wednesday, December 1, 2010
rollover button
to make a rollover button/link on dreamweaver theres a few things you have to do. First of all you have to make your button/link on illustrator of what it looks like before you roll over it. Then you make the button/link of what it looks like when you do roll over it.
Now you go onto dream weaver and click the "Draw AP Div" button and draw a box whereyou want the button/link. Then you go to the common tool bar and click on the "image" button and select "rollover image" then click the browse and select your before and after image then click "OK".
Now you go onto dream weaver and click the "Draw AP Div" button and draw a box whereyou want the button/link. Then you go to the common tool bar and click on the "image" button and select "rollover image" then click the browse and select your before and after image then click "OK".
BEFORE

AFTER

Friday, November 19, 2010
Website Pages
Below are my web pages. i chose the black and white color schem because it stands out the words are easy to read and it looks cool. i chose the font neuropol because i thought it was easy to read but still fit the theme. also i put the lines on the side to fill in some space and also to give a constant general theme. For my icons I put pictures representing the pages and what the actual links are underneath the icons. also i titled all my pages with what they are to make it easier to surf through the website. 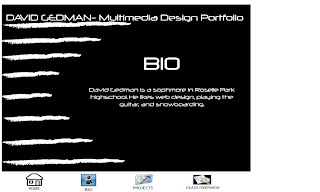


Thursday, November 11, 2010
Gedman_PHOTO MONTAGE


First of all i found a horse with a guy riding it. Then i got a photo of me and put the face on the guy riding the horse. Latly i got a picture of a sword off google and put it in my hand.
Tuesday, November 2, 2010

step 1: firstof all i found a picture of a pool then i useda layer mask to erase parts of the macroni i didnt want.
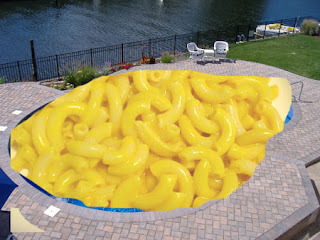

step 2: next my partner drew added put yellow around the macroni to blend it in and used to blurr tool to fix it up lastly he put a car in the pool to make it look like its sinking.


step 3: for this step i found a picture odf a guy on top of a car and used layer mask to edit it in. 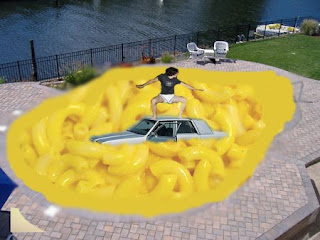

step 4: lastly my partner drew got a picture of a guy with his head on fire and used a layer mask to edit it onto the guys face.

Subscribe to:
Posts (Atom)